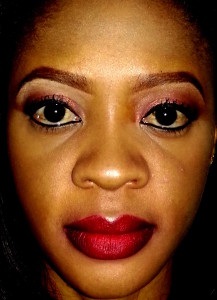
The French word Ombre simply means fading from dark to light or vice
versa. The ombre trend was first seen in hair and nail colours (two
tones) now we have everyone in two toned lipsticks from the runway to
the streets. This fun and vibrant trend is a look anyone can achieve.
Its pretty simple as long as you understand the technique behind it. It
gives the lips a plumper look and you can wear this at daytime or night
time. To pull off the ombre lips, the most important thing you need are
two different lipstick of the same family(light and dark) preferably
matte lipstick. I decided to give it a try myself and here’s how I went
about it:
What you need for this Ombre lips:
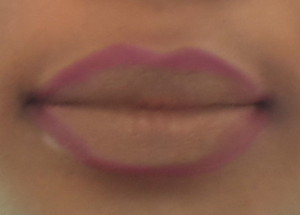
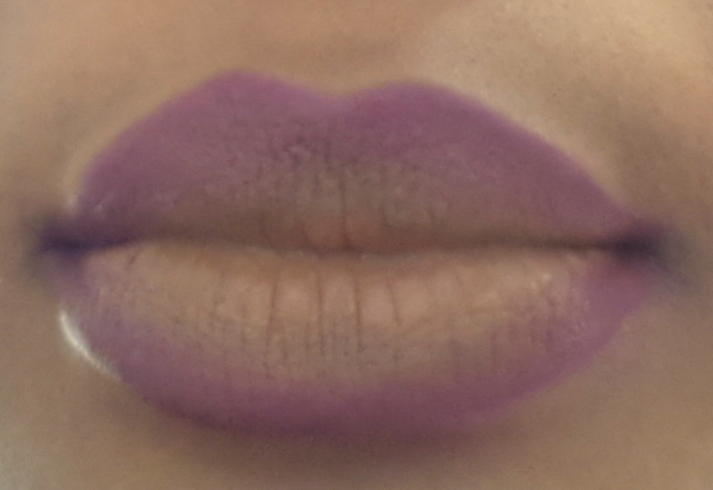
1. Two Shades of Lipstick (Red and Deep wine) I used a very deep purple for my second lipstick
2. Lip colour liner (a shade darker than the lipstick colour you’ll use for the pout area)
3. Lip brush (to apply and blend colour)
4. Lip moisturizer (to prepare and soften the lips)
5. Concealer
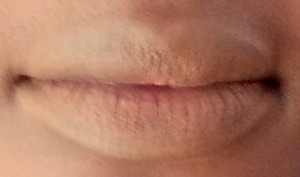


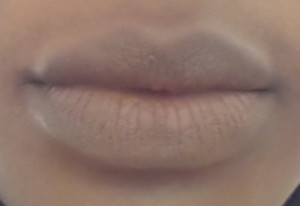
* Buff: The first step is to buff the lips to avoid a flawed finishing. You can achieve this in the shower by using a lip scrub or the good old tooth brush to gently brush away any dry skin on the lips.
* Moisturise: Apply a good lip moisturizer to your lips. I use shea butter because it makes the lips soft and is not greasy.
* Concealer: Apply a concealer that matches your complexion all over your lips, this is to achieve an even toned colour on your lips.
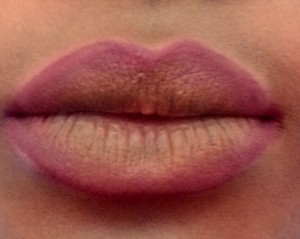
* Line : Use the lip colour liner to line the inner and outer rim of your lips to prevent lipstick bleeding. I used Zaron brick layers lip liner pencil in the picture.
*Blend: Using your lip brush blend your lined lip by stroking inwards from the outer rim of your lips.
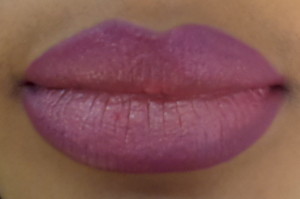
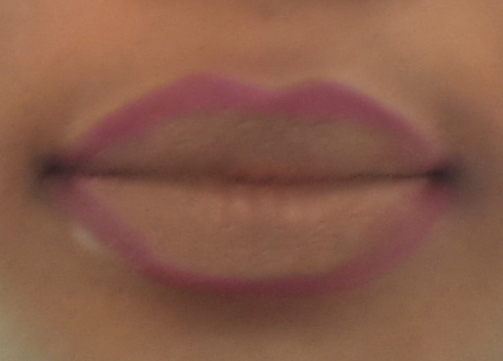
* Paint: Fill in your lips (full coverage) with the lipstick you want for the main lips. Apply with a lip brush for flawless finish. I used Mac Ruby Woo. Apply the dark lipstick to the corners of your lips. To achieve the dark corner effect on my lips I applied Avon Vamp Ultracolour Lipstick.
*Blend and Blot: Blend the dark corner inward from the corner of your lips to achieve a 3D effect where the dark part seamlessly fades into the bright part. Blot your lips after that.
*Paint Again: Re-apply the bright coloured lipstick so it pops against the dark part and you’re good to go.
This is what it looked like after i was done.
For the second Ombre lips, here’s what you need:
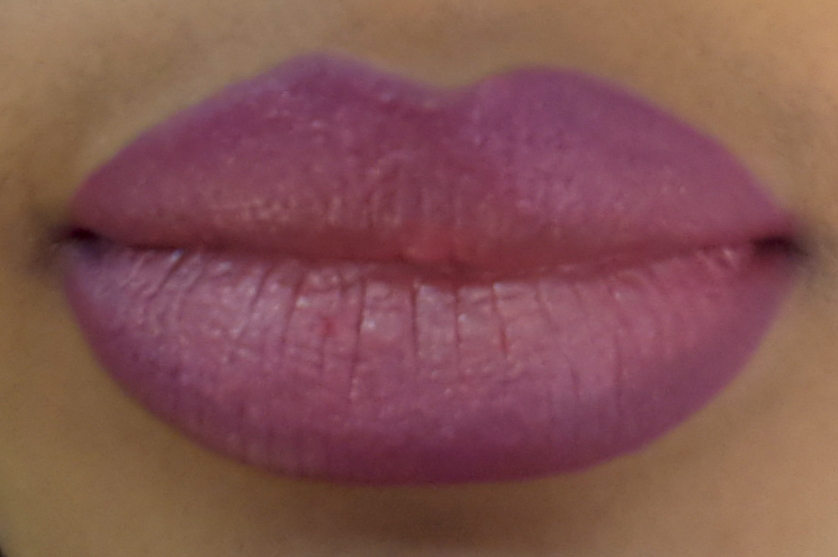
1. A lipstick (I used a light pink shade from a lip palette)
2. Lip colour liner (a deeper shade of your lip stick because it will also serve as a second lip colour). I used Zaron fussy fuschia lip liner pencil.
3. Lip brush (to apply and blend colour)
4. Lip moisturizer (to prepare and soften the lips)
5. Concealer
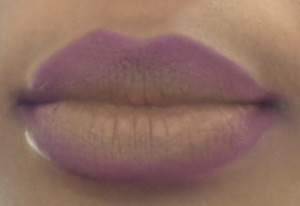

* Buff: The first step is to buff the lips to avoid a flawed finishing. You can achieve this in the shower by using a lip scrub or the good old tooth brush to gently brush away any dry skin on the lips.
* Moisturise: Apply a good lip moisturizer to your lips. I use shea butter because it makes the lips soft and isn’t greasy.
* Concealer: Apply a concealer that matches your complexion all over your lips, this is to achieve an even toned colour on your lips.
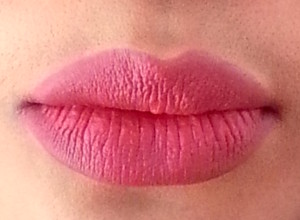
* Line : Use the lip colour liner to line the inner and outer rim of your lips generously as this also serves as your 2nd lip colour too. I used Zaron fussy fuschia lip liner pencil in the picture.
*Blend: Using your lip brush blend your lined lips by stroking inwards from the outer rim of your lips.
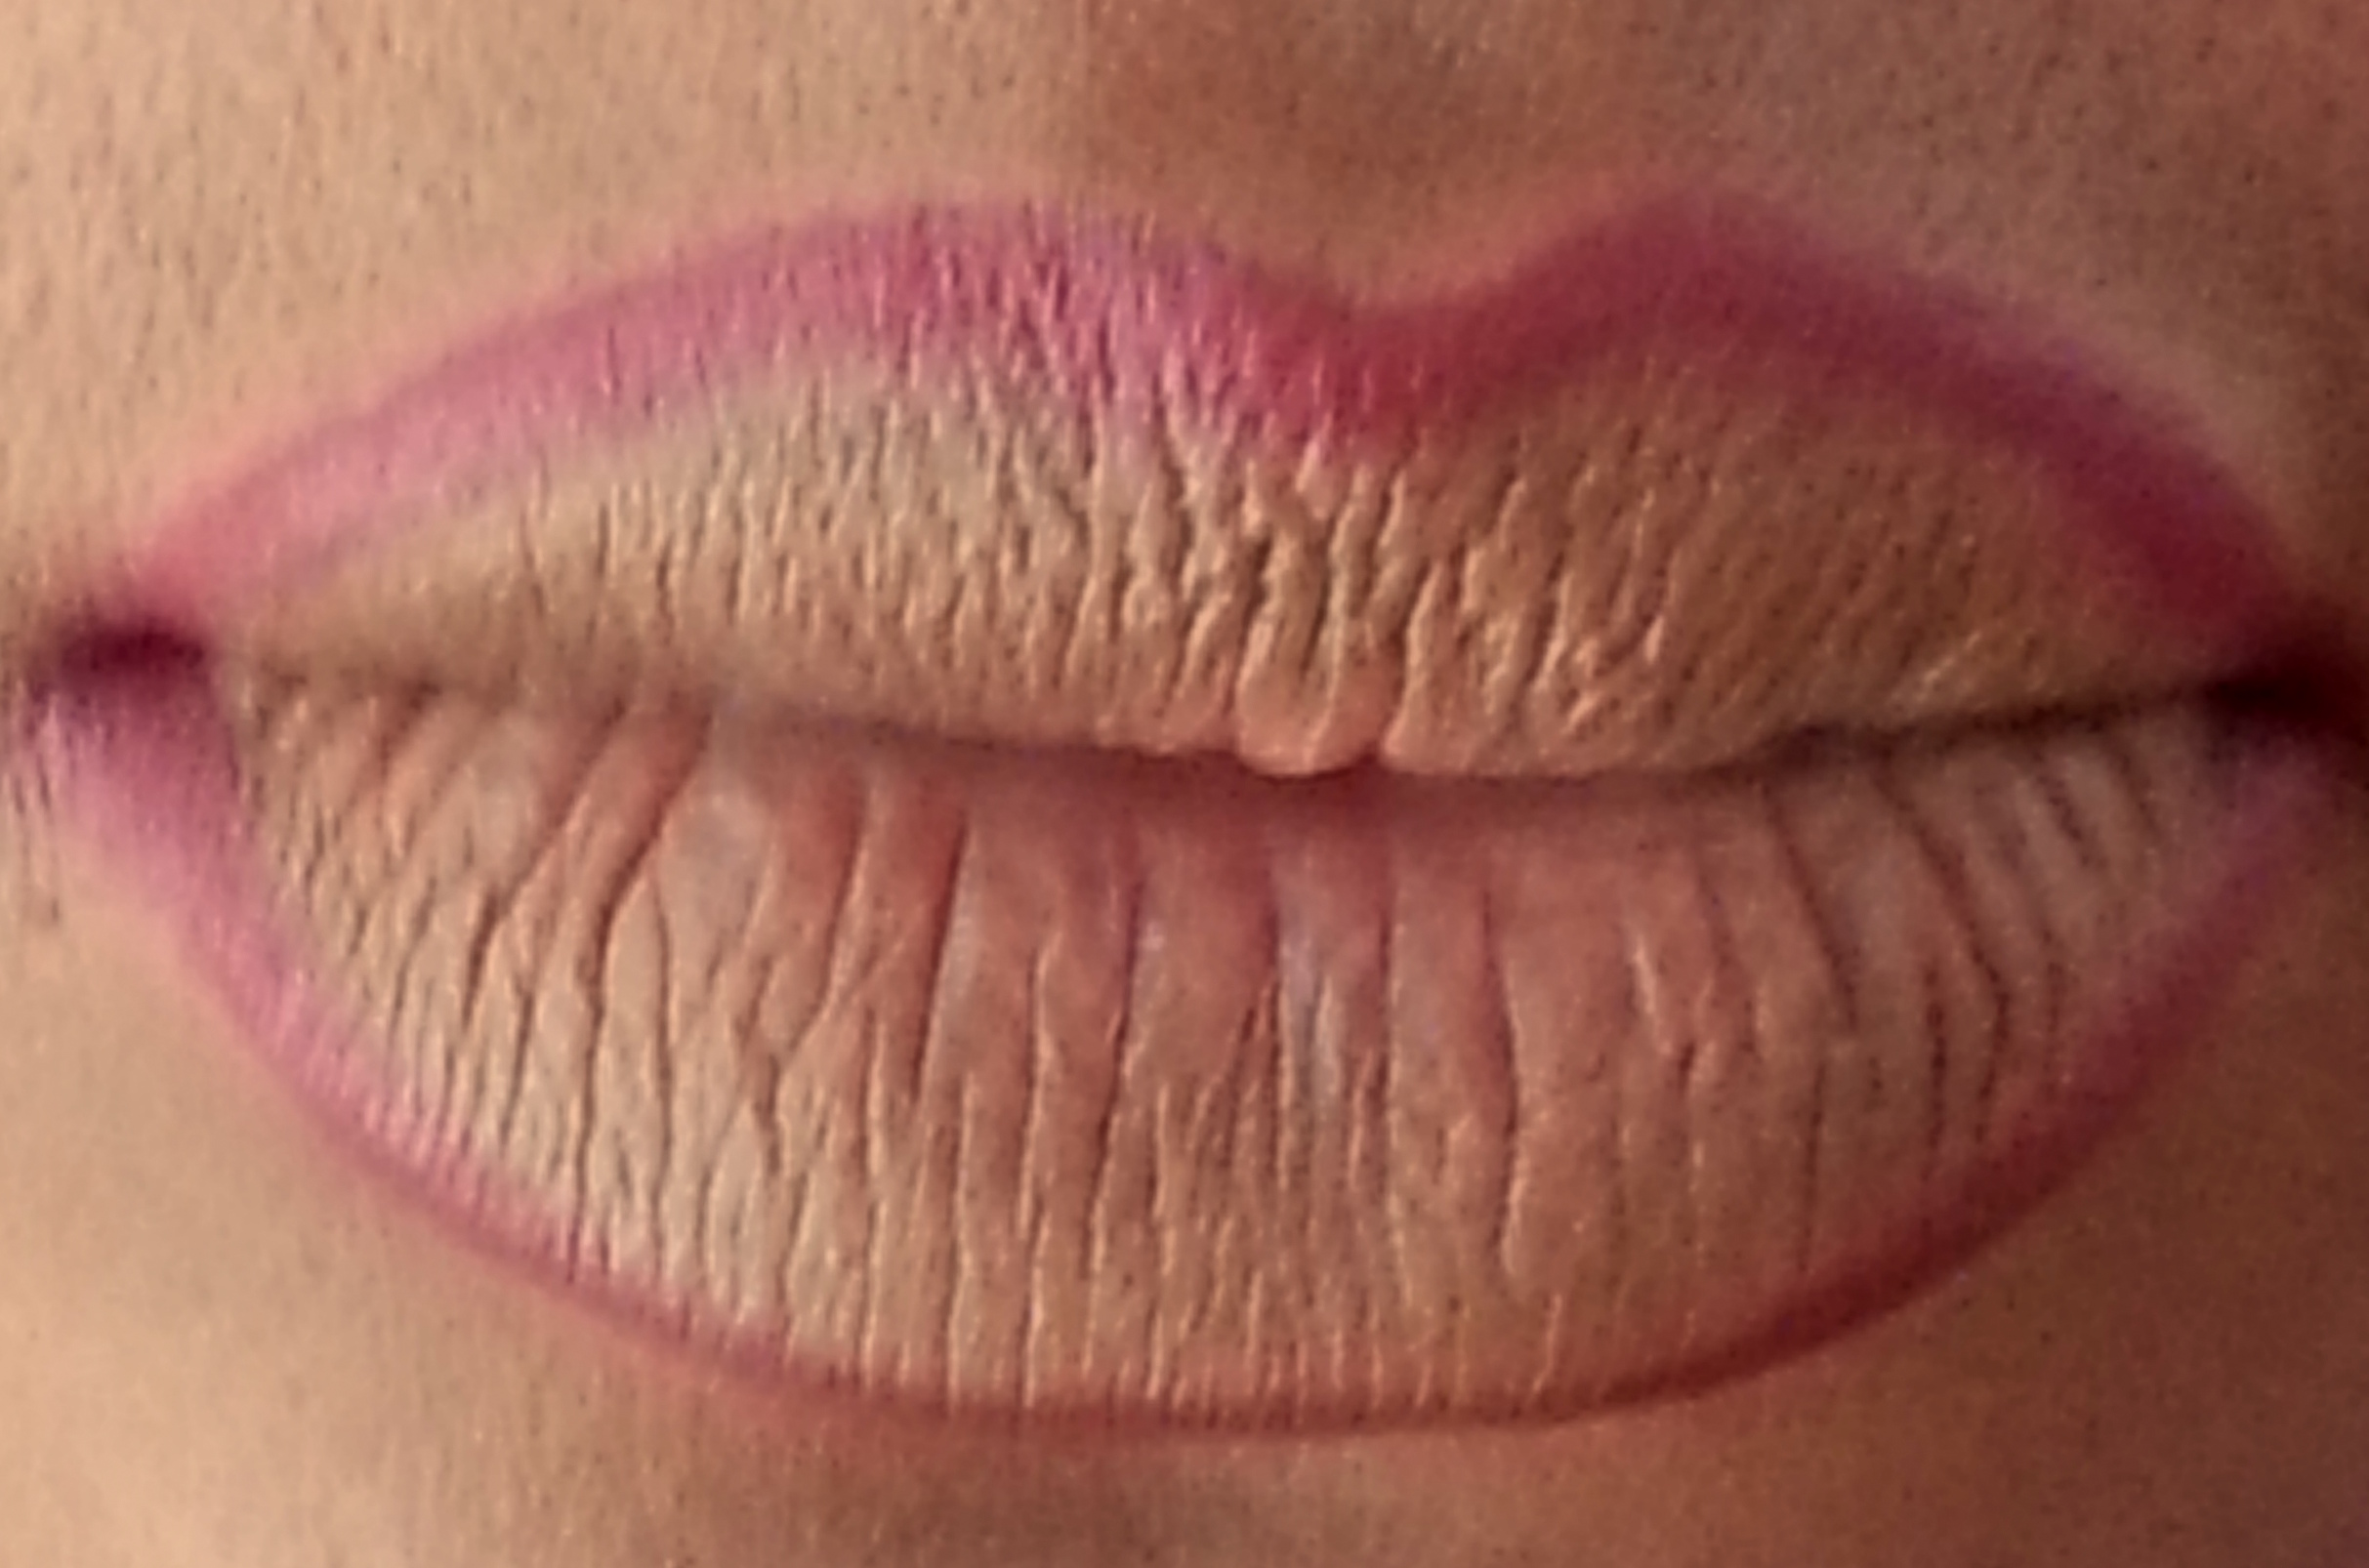
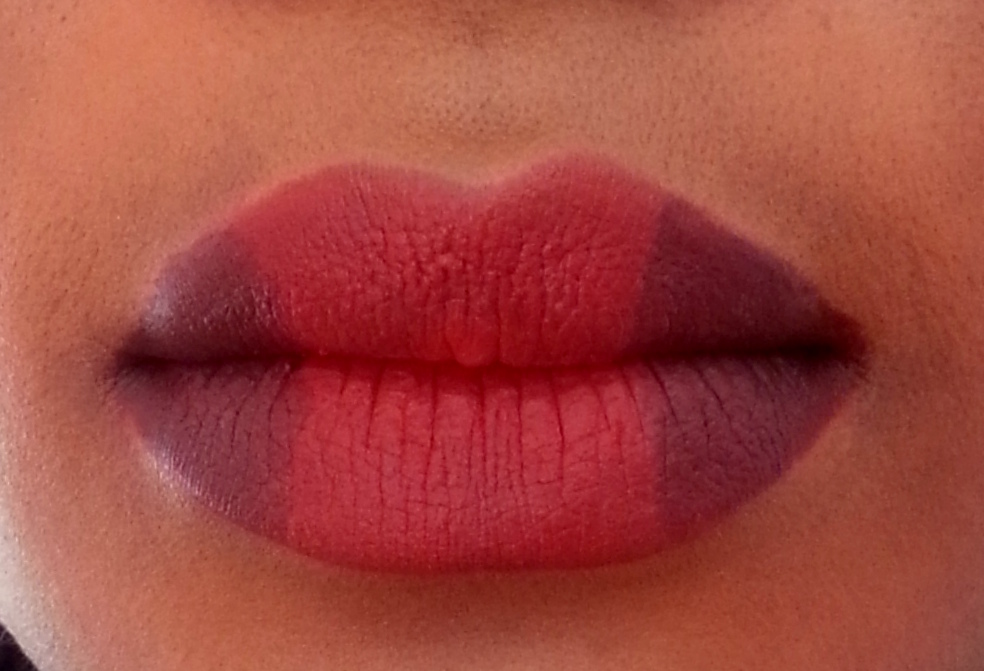
* Paint: Fill in your lips (starting from where the lined area ends) with the lipstick you want for the main lips. Use a lip brush for a smooth and even coverage
*Blend and Blot: Blend the thick lined area from the rim of your lips inwards and towards the centre of your lips. The whole idea is to make the outer area pop against the light shade lipstick in the middle. Blot your lips after that.
*Paint Again: Re-apply lipstick and fill in any that needs filling.
This is what it looked like after i was done.
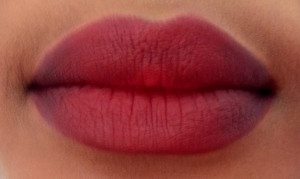
Funny enough we’ve all been going around with ombre lips for years now I guess what sets this season apart from the rest is the outrageous and adventurous colour combinations we see now that we wouldn’t have dared to walk the streets in many years ago. Still, some ombre lips are best kept on the runway and never to be seen on the streets. So what do you think of my attempt at the ombre lips? Be nice okay
What you need for this Ombre lips:
1. Two Shades of Lipstick (Red and Deep wine) I used a very deep purple for my second lipstick
2. Lip colour liner (a shade darker than the lipstick colour you’ll use for the pout area)
3. Lip brush (to apply and blend colour)
4. Lip moisturizer (to prepare and soften the lips)
5. Concealer


* Buff: The first step is to buff the lips to avoid a flawed finishing. You can achieve this in the shower by using a lip scrub or the good old tooth brush to gently brush away any dry skin on the lips.
* Moisturise: Apply a good lip moisturizer to your lips. I use shea butter because it makes the lips soft and is not greasy.
* Concealer: Apply a concealer that matches your complexion all over your lips, this is to achieve an even toned colour on your lips.
* Line : Use the lip colour liner to line the inner and outer rim of your lips to prevent lipstick bleeding. I used Zaron brick layers lip liner pencil in the picture.
*Blend: Using your lip brush blend your lined lip by stroking inwards from the outer rim of your lips.
* Paint: Fill in your lips (full coverage) with the lipstick you want for the main lips. Apply with a lip brush for flawless finish. I used Mac Ruby Woo. Apply the dark lipstick to the corners of your lips. To achieve the dark corner effect on my lips I applied Avon Vamp Ultracolour Lipstick.
*Blend and Blot: Blend the dark corner inward from the corner of your lips to achieve a 3D effect where the dark part seamlessly fades into the bright part. Blot your lips after that.
*Paint Again: Re-apply the bright coloured lipstick so it pops against the dark part and you’re good to go.
This is what it looked like after i was done.
For the second Ombre lips, here’s what you need:
1. A lipstick (I used a light pink shade from a lip palette)
2. Lip colour liner (a deeper shade of your lip stick because it will also serve as a second lip colour). I used Zaron fussy fuschia lip liner pencil.
3. Lip brush (to apply and blend colour)
4. Lip moisturizer (to prepare and soften the lips)
5. Concealer


* Buff: The first step is to buff the lips to avoid a flawed finishing. You can achieve this in the shower by using a lip scrub or the good old tooth brush to gently brush away any dry skin on the lips.
* Moisturise: Apply a good lip moisturizer to your lips. I use shea butter because it makes the lips soft and isn’t greasy.
* Concealer: Apply a concealer that matches your complexion all over your lips, this is to achieve an even toned colour on your lips.
* Line : Use the lip colour liner to line the inner and outer rim of your lips generously as this also serves as your 2nd lip colour too. I used Zaron fussy fuschia lip liner pencil in the picture.
*Blend: Using your lip brush blend your lined lips by stroking inwards from the outer rim of your lips.
* Paint: Fill in your lips (starting from where the lined area ends) with the lipstick you want for the main lips. Use a lip brush for a smooth and even coverage
*Blend and Blot: Blend the thick lined area from the rim of your lips inwards and towards the centre of your lips. The whole idea is to make the outer area pop against the light shade lipstick in the middle. Blot your lips after that.
*Paint Again: Re-apply lipstick and fill in any that needs filling.
This is what it looked like after i was done.
Funny enough we’ve all been going around with ombre lips for years now I guess what sets this season apart from the rest is the outrageous and adventurous colour combinations we see now that we wouldn’t have dared to walk the streets in many years ago. Still, some ombre lips are best kept on the runway and never to be seen on the streets. So what do you think of my attempt at the ombre lips? Be nice okay
Loool @Be nice. Ok, i was a little skeptical when i saw you pictures of your lined lips but it isn't bad actually. It came out cute. Not sure i want to apply foundation on my lips though because i lick them a lot. I feel i get poisoned enough with all the lipstick i'm ingesting. No need to add more :)
ReplyDeletehttp://www.toinlicious.blogspot.com/
I prefer wearing lipsticks in the night----so I hear you...though adventuring is fascinating
ReplyDelete